

Table of contents


No headings in the article.
Hello Everyone !👋
Abhi here; nice to meet you all. In this article I'm going to walk you through every step you need to take to build your very first Web Server using Node.js.
So, Let's get started.😊
The first thing we need to do is download Node.js from nodejs.org, then follow the different download instructions as they appear. This is very simple, and once you're done, we'll need to launch Visual Studio Code to get started.
Node.js has been downloaded and set up at this point. Time to discuss what Node.js actually is !?🤔
- Basically, Node.js is a technique to run JavaScript code outside of a browser. It can be used to run desktop applications, servers, and pretty much anything else you want to do with javaScript.
The thing that we're going to do is create a web server using Node.js so to get started with that.
- We simply need to create a JavaScript file inside of our project and give it the name app.js. Inside the JS file,We must build our server and instruct it to begin listening on a specific port.
so, the first thing we must do is require a specific library in node called HTTP that will be required to launch the server. Then, we can simply create a variable named HTTP to require the library Node.js, you just type the require keyword followed by the library's name.
const http = require('http')
The next step is to establish a variable that will inform our code that which port our server will be listening onand we're going to use this later.
const port = 3000
Next, we can actually create our server. To do this, we'll create a server variable here and call the createServer function on this object using the HTTP library we just imported. This function accepts a single function with two parameters, the request and the response parameters. Our server will call this method whenever someone requests a page from it because we will handle all of the various server actions inside of it.
const server = http.createServer(function(req, res) { })
The next step is to configure our server so that it will listen on the desired port now that we have this server object called server.listen() method and pass it that port variable and this takes a single function that it'll call if there's an error potentially.
server.listen(port, function(error) { })
Thus, as soon as our server begins to listen, it will execute this method and determine whether to pass an error or nothing if it was successful.
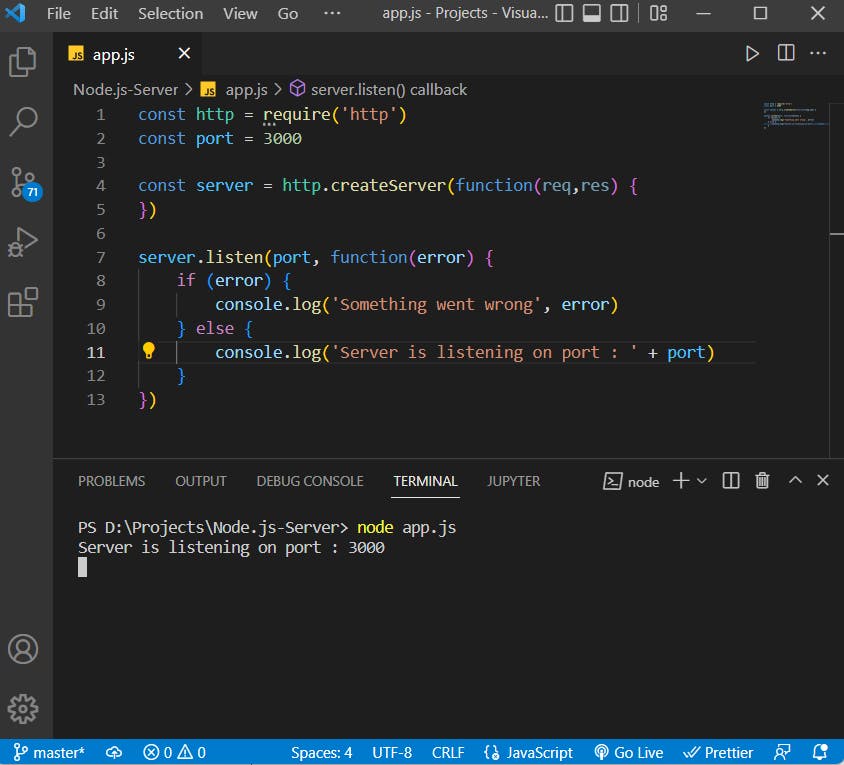
In order to check our logs and see what the error was that occurred, we're going to check to see if that error already exists. we're just going to pass the error along to that log statement and log a message stating that something went wrong. If there was no error, however, we want to log that our server is listening on port, so we're just going to pass that port variable we previously created.
server.listen(port, function(error) {
    if (error) {
        console.log('Something went wrong', error)
    } else {
        console.log('Server is listening on port ' + port)
    }
 })
Now that our server is actually listening, all we need to do to launch it is type node followed by the name of the file we want to execute. When our project's terminal is open, we simply type node app.js and press Enter. You'll see that it says server is listening on port 3000, which is ideal.
Congratulations to everyone!🥳We achieved.
- Image of the finished project!🤩